The idea of remote working is used a lot more often in businesses than ever before. When working from home your employees may need to access the network in order to work. The issues with leaving your network open to the public will cause security problems as anyone is able to reach it. Here is a set by step guide on setting up Duck DNS.
The business phone system is one piece that needs to be reachable for remote workers to take and make calls while working from home. Switchvox softphone feature lets your employees work remotely using the Sangoma Switchvox instead of having to use their personal phone number. The firewall that the PBX is behind will need to have ACL rules put in to isolate traffic. But IP’s of homes change and in order to circumvent that Dynamic DNS is used.
Setting up Duck DNS
It is a short process to set up Duck DNS client on a remote worker’s computer but one might get lost so we made a step by step guide on how it is done.
Signing up
In order for a remote worker to use Duck DNS they have to make a sign in. Using a Google account is the easiest way to sign in as most individuals already have a Google account. Go to http://www.duckdns.org and on the top right sign in with google.

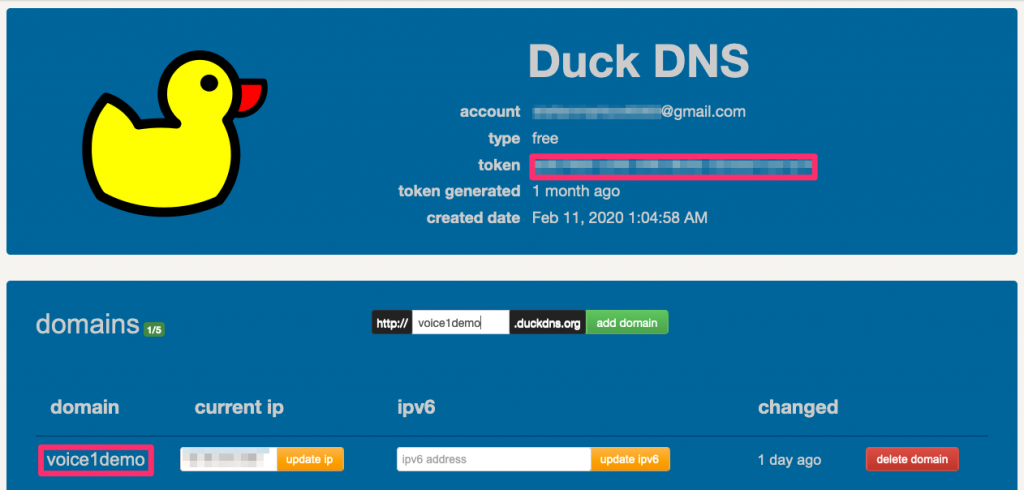
Once you have signed in http://www.duckdns.org/login.
- The first thing you should do is copy your token. This will be required later.
- By default it will use your email as the domain, but you can add a new one. You will need this ‘domain’ in the next section.
Most IT administrators will use a naming convention to rapidly identify systems such as: “ACME-PC001”. You of course can use any name you wish, so long as another user has not already taken it. An easy method I recommend to clients is to use “company_name-computer_hostname”.
You should now have your domain and token copied. If you have not done so do so now because you will need them next!
Installing Duck DNS
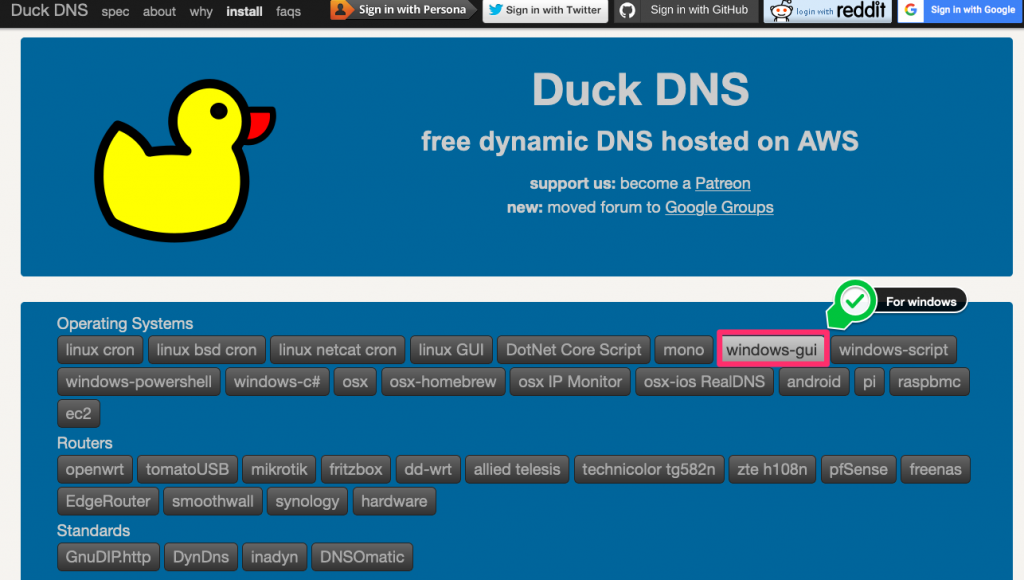
After you have created your domain go to the link www.duckdns.org/install.jsp. Most remote workers are on Windows computers, so I will show the windows installation and setup process. Duck DNS has a wide arrange of Operating systems that it supports and instructions to go along with each one.

Click on the windows-GUI option on the operating system and scroll down to the installation link
If there is a select domain option. Select the domain that you made on the step before. From there you can download the Windows GUI from http://www.etx.ca.
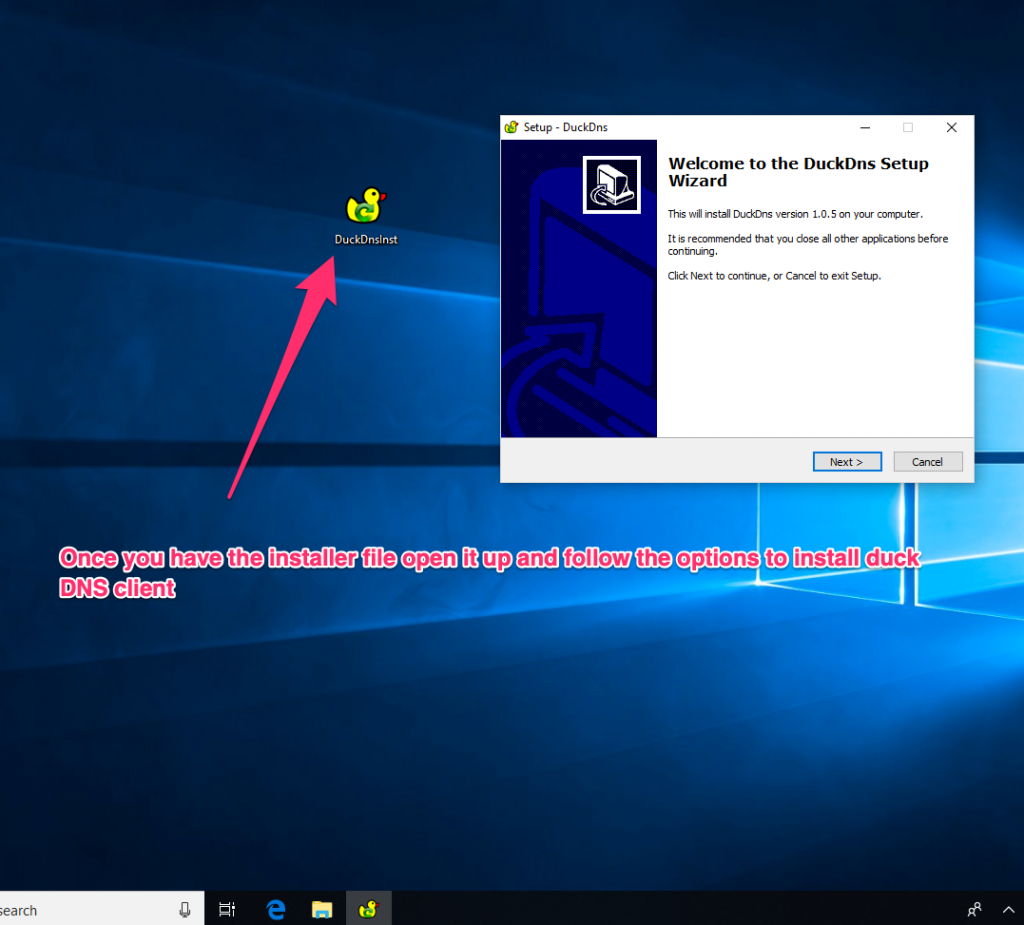
Download the installer, or zip file depending on your preference or need.

Go through the installation steps on the installer. If your not familiar with the computer directory on the final step there will be a box to make a desktop shortcut that should be selected.
Setting up Duck DNS

Once the Duck DNS client is installed you can open it up and put it in the domain and token which we got from the step below. After you have filled those two things in click OK which should give you a successful message.
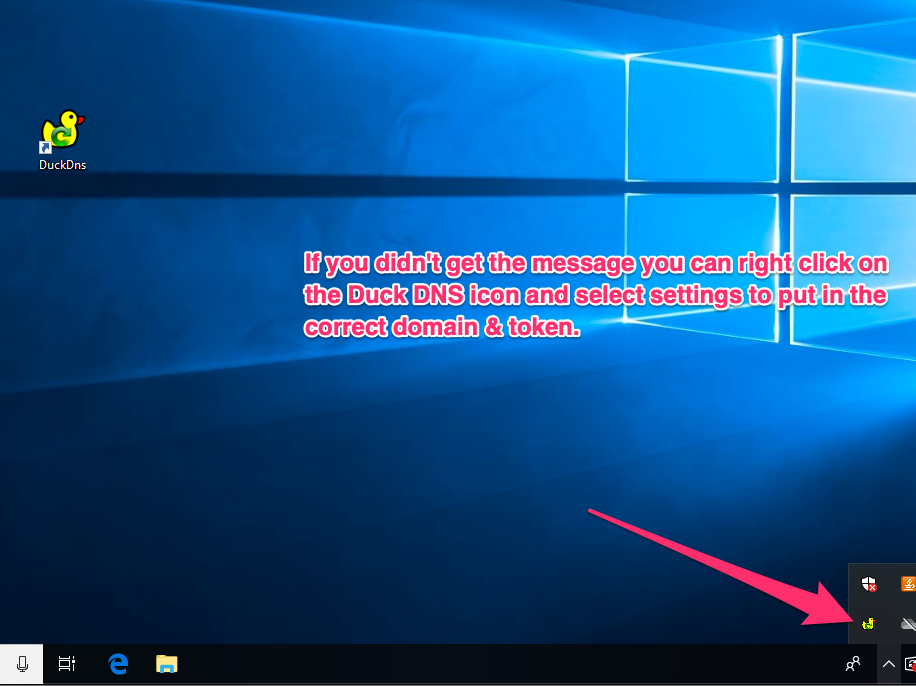
Duck DNS runs in the background and on the bottom right notification box you will see it when it is running. You can drag it on your bar if you drag and drop it in order to see when it is there. If you need to put in different settings simply right click it and select settings to put in the correct domain and token.

Give the domain name to the individual putting in the domains in the firewall. The domain will be “domain.duckdns.org”

Stefan has been fixing desktop issues for friends and family since he came to America. Back in Europe he spent too much time in internet cafes and as he moved into the workforce he kept returning to electronics. When he isn’t working on IT support, he enjoys spending time with his friends and family. Stefan enjoys reading classic literature, working out and learning to cook from scratch.
Pingback:duckdns.org login Account Official Log In Customer Service Contact Online Info - bankech.com
Pingback:Duckdns Logga In - SwedenSpace
Pingback:duckdns login - infopvp
Pingback:Duckdns Logga In – Sweden Logga In